As for now Cloud Clusters(https://www.cloudclusters.io/) hosting service didn’t integrate Cloudflare’s CDN service, but our clients still can use Cloudflare’s CDN service to speed up their websites. This article will guide you how to enable CDN for your WordPress sites as an example. Please note that this guidance also applies to Magento, Moodle, Odoo, Opencart, Drupal which are hosted at Cloud Clusters Inc.( https://www.cloudclusters.io)
Precondition
- Signed up an account at Cloudflare(https://www.cloudflare.com) ;
- Have a registered domain ;
- Deployed a WordPress instance at wp-clusters(https://www.wp-clusters.com);
1 Deploy a WordPress instance
The first step is to deploy an wordpress site at https://www.wp-clusters.com

2 Sign up an account at Cloudflare
Open https://www.cloudflare.com then sign up an account.
3 Add domain to CloudFlare
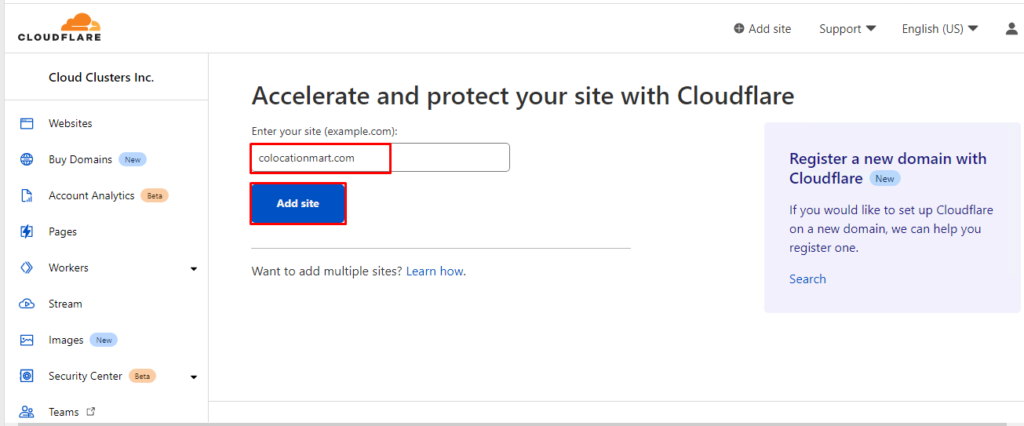
Add your domain to cloudflare once you have signed up an account with cloudflare.
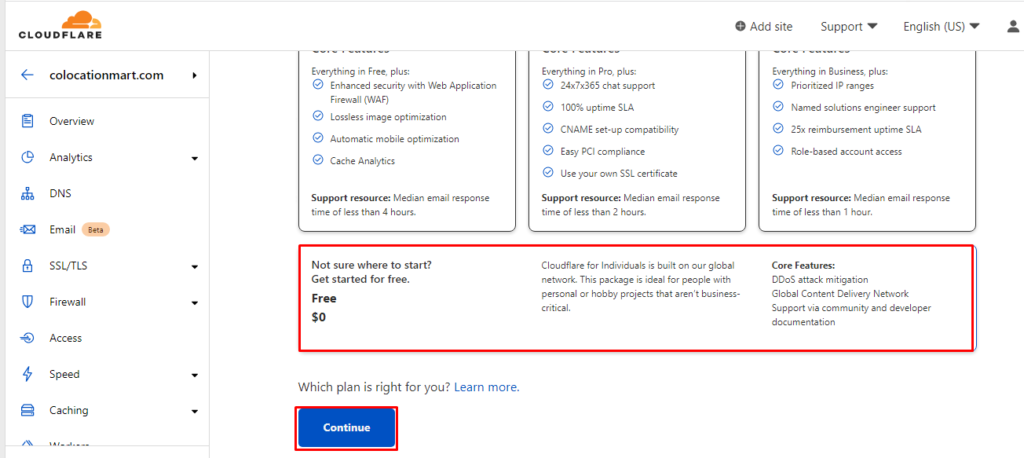
Select a plan which you need. We recommend you to choose the Free plan from start.
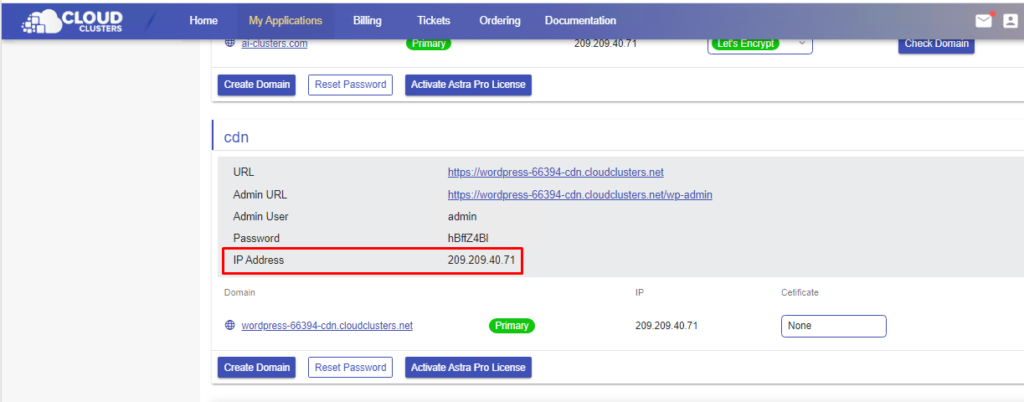
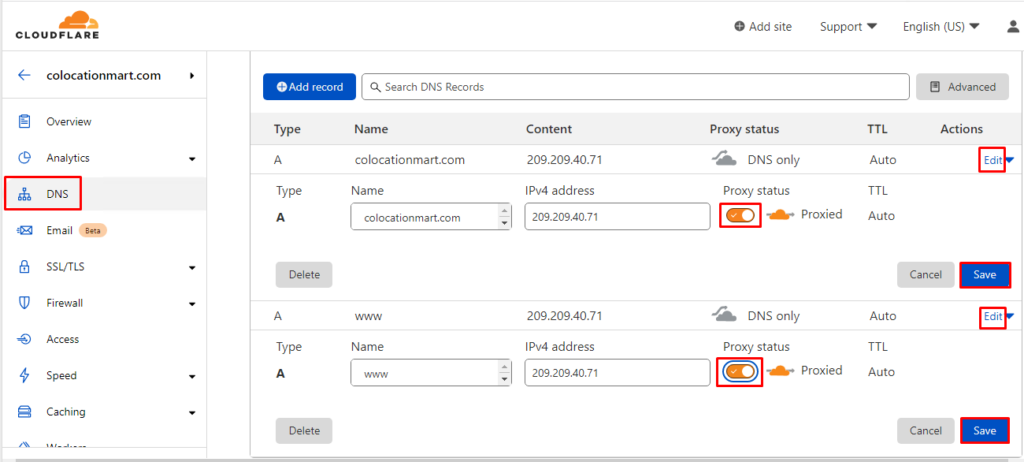
Set up two DNS A records for your domain, Get the IP address from your client panel(https://clients.cloudclusters.io). And enable DNS only mode for your domain. If Proxy status is enabled, please disable it.
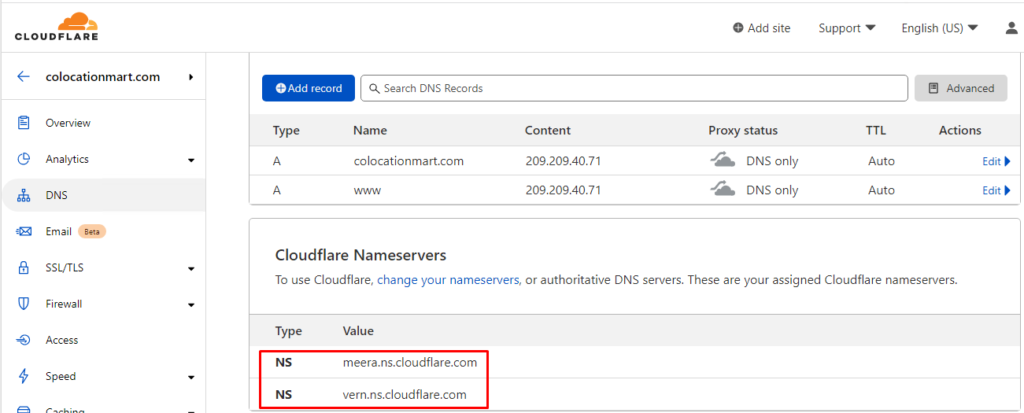
Change the name servers to cloudflare nameservers for your domain at your domain provider.
4 Add domain to your WordPress Site
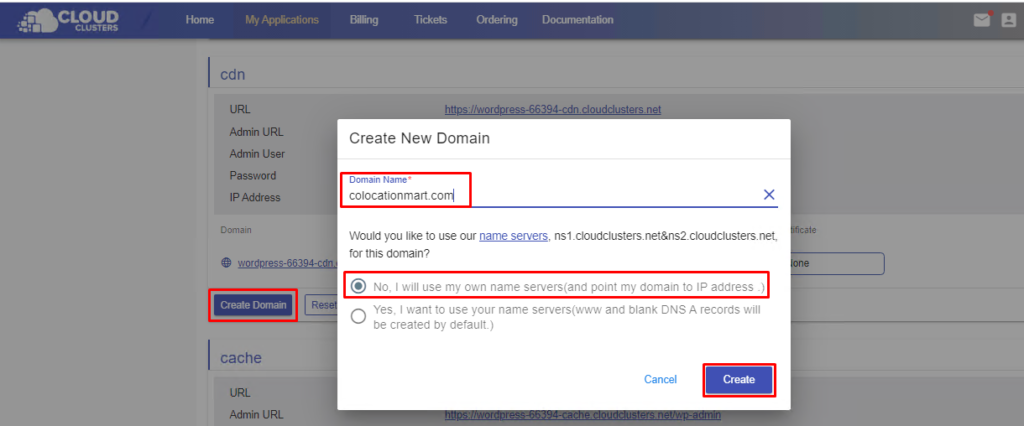
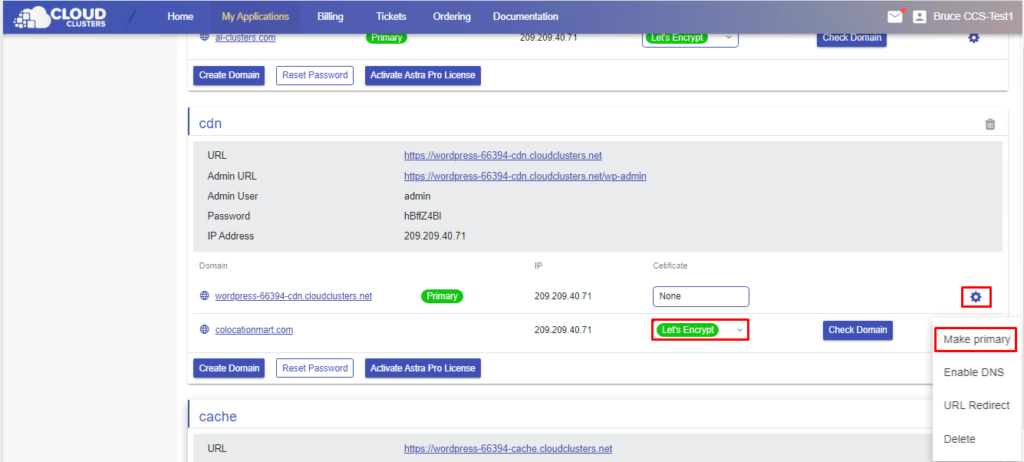
Click “Create Domain” to add your domain to your wordpress site. Enter your domain name then select the #1 option.
Enable Free SSL for your domain after you added your domain to your wordpress site. Or you can install custom cert for your domain if you have SSL of your domain.
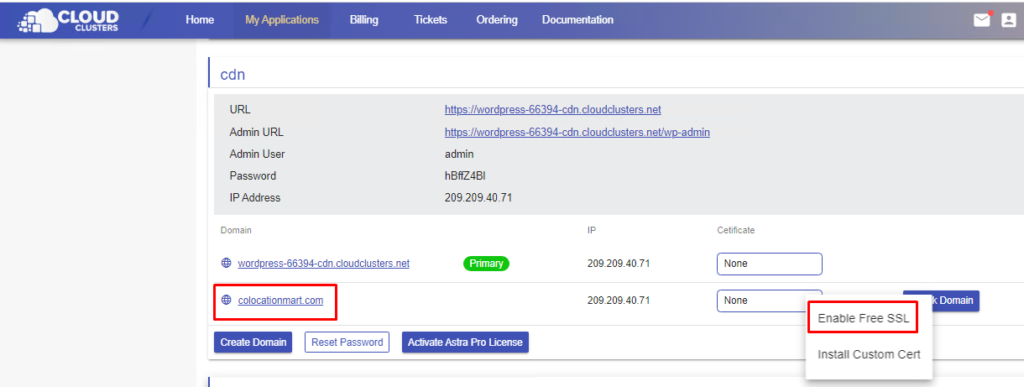
Make your domain name as primary domain once you installed Free SSL for your domain.
5 Enable CDN for your domain at Cloudflare
On cloudflare client panel, enable proxy for your two domain DNS records then save the changes.
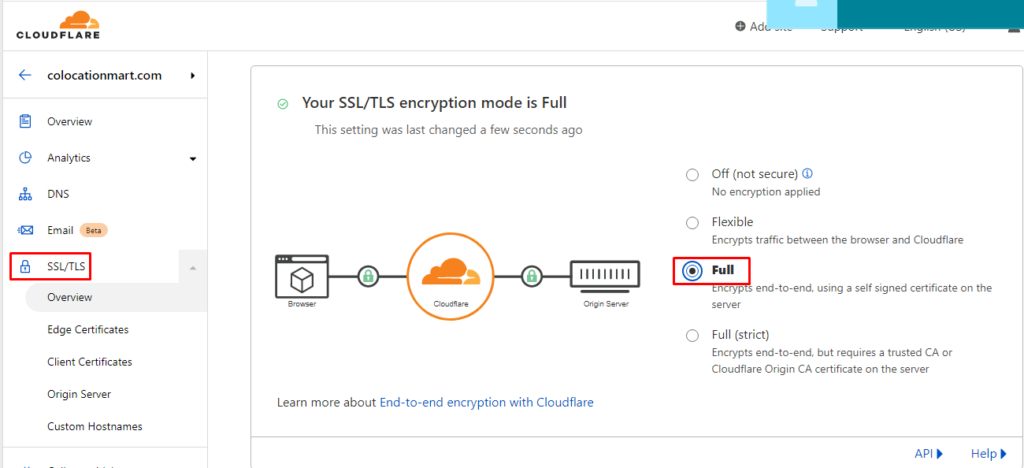
Enable Full mode for your website SSL/TLS encryption.
6 Verify if CDN is enabled for your domain
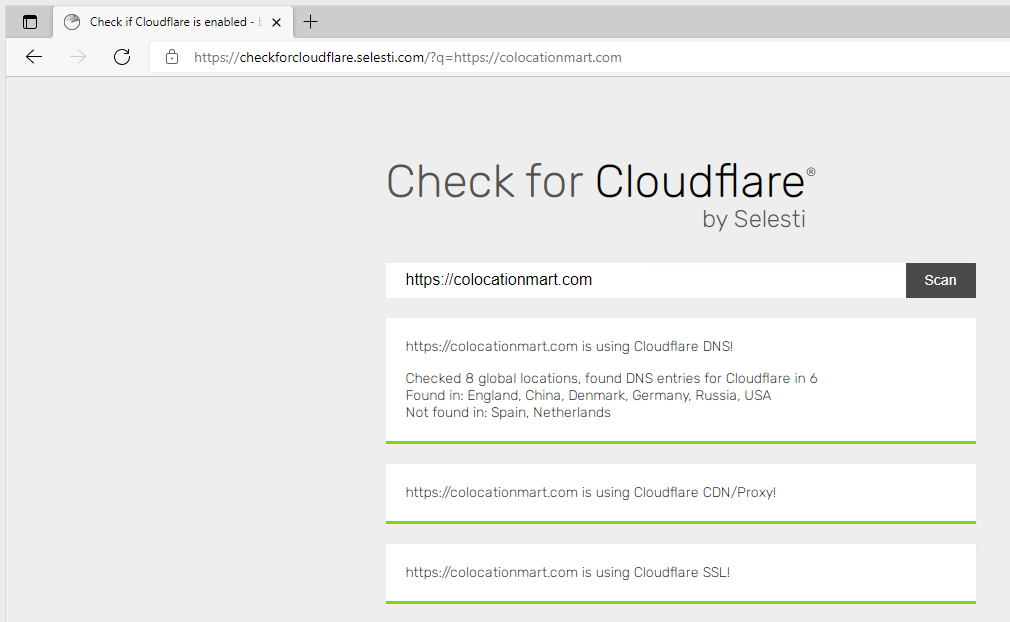
You can verify if CDN is enabled for your domain at https://checkforcloudflare.selesti.com/
